Authentication on Backstage with MS Entra ID
Integrate Microsoft Entra ID with Backstage for secure authentication. A step-by-step guide on App Registration, backend setup and identity management.
I’ve been hearing for a while about how Backstage is a revolutionary tool and how it can give developers more freedom when requesting cloud resources.
If you are a DevOps or cloud operator, you’ve likely encountered a situation where you receive a ticket to provision a resource but can’t always deliver it as quickly as the squad expects.
I had to explore how Backstage works to address this exact challenge. What I discovered is that, while the tool is powerful, its documentation is not the most user-friendly.
Since I found it difficult to locate online resources on authentication with Entra ID, I decided to create this post explaining what I believe is the simplest way to set it up. This tutorial will guide you through setting up Backstage from scratch and configuring Microsoft Entra ID as its identity provider (IDP) for secure and efficient authentication.
What is Backstage?
According to their official description:
Backstage is an open-source framework for building developer portals. Powered by a centralized software catalog, Backstage restores order to your microservices and infrastructure and enables your product teams to ship high-quality code quickly — without compromising autonomy.
Backstage unifies all your infrastructure tooling, services, and documentation to create a streamlined development environment from end to end. —
Note: Backstage is entirely developer-focused. If you, like me, come from an infrastructure background, you may find it challenging since all configurations are done through system files — there is no admin interface for managing users, permissions, integrations, or plugins.
Step 1: Start a New Backstage Instance
The setup documentation is quite simple and self-explanatory, so I’ll let you follow those steps on your own.
Once the initial setup is complete, you should be able to run the application locally:
1
yarn dev
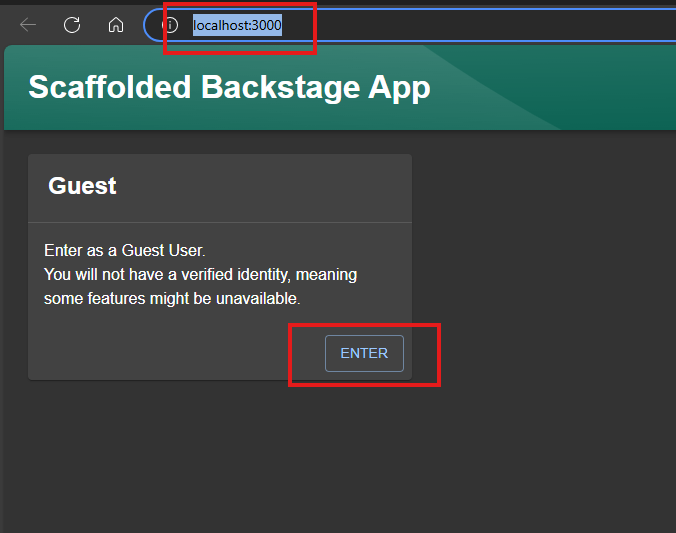
You can then access Backstage locally at http://localhost:3000, signing in as a guest user.
 Backstage’s home page
 Guest home page
Guest access is meant for development purposes only and is not recommended for production. However, if you still want to enable full guest access, you can find the documentation here.
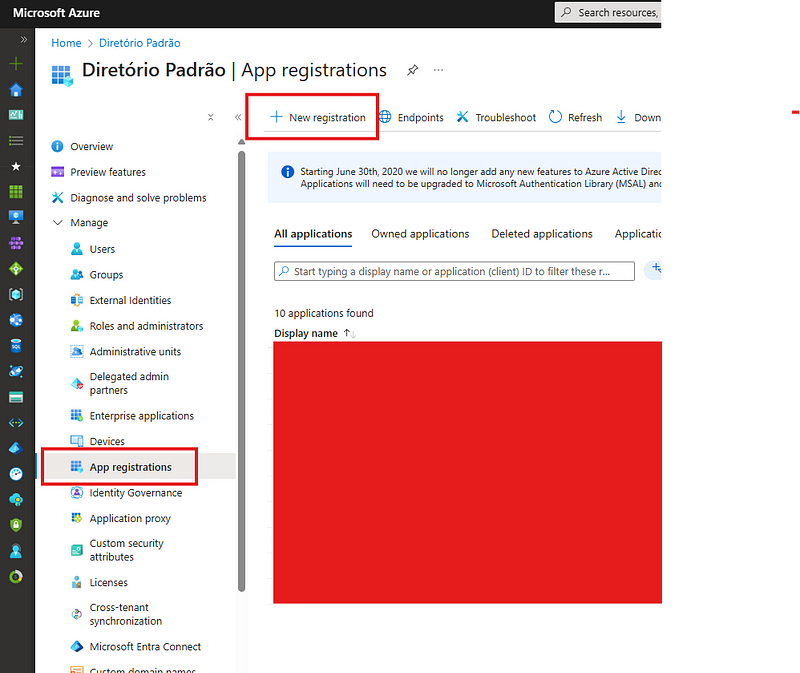
Step 2: Create an App Registration on Entra ID
To enable authentication, you must create an App Registration in Microsoft Entra ID, which will be used by Backstage. he documentation to create the resource is on this page.
To start, go to the corresponding menu for Entra ID:
 Selecting Entra ID
Select App Registrations, then click New Registration:
 Creating a new app
Choose the appropriate settings for your use case:
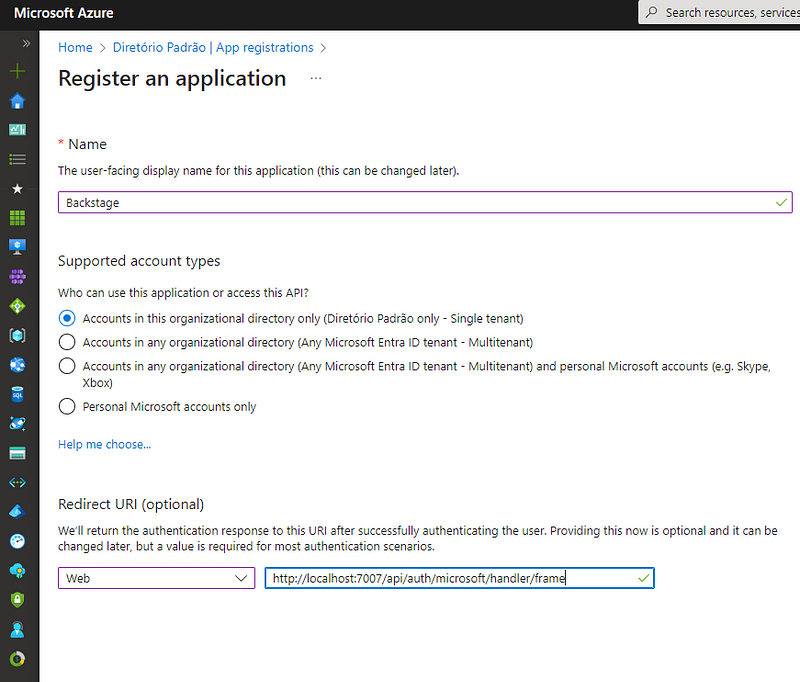 Creating app registration
For development, use
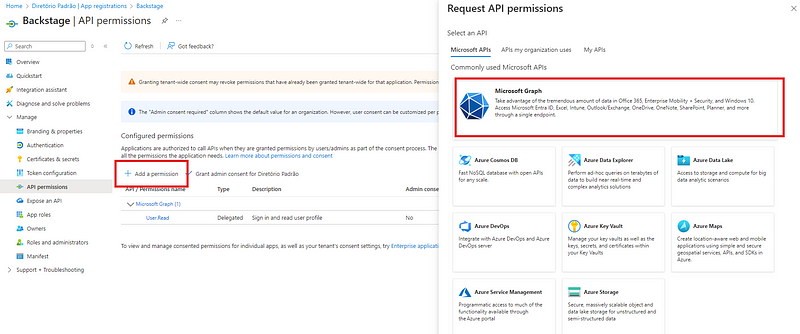
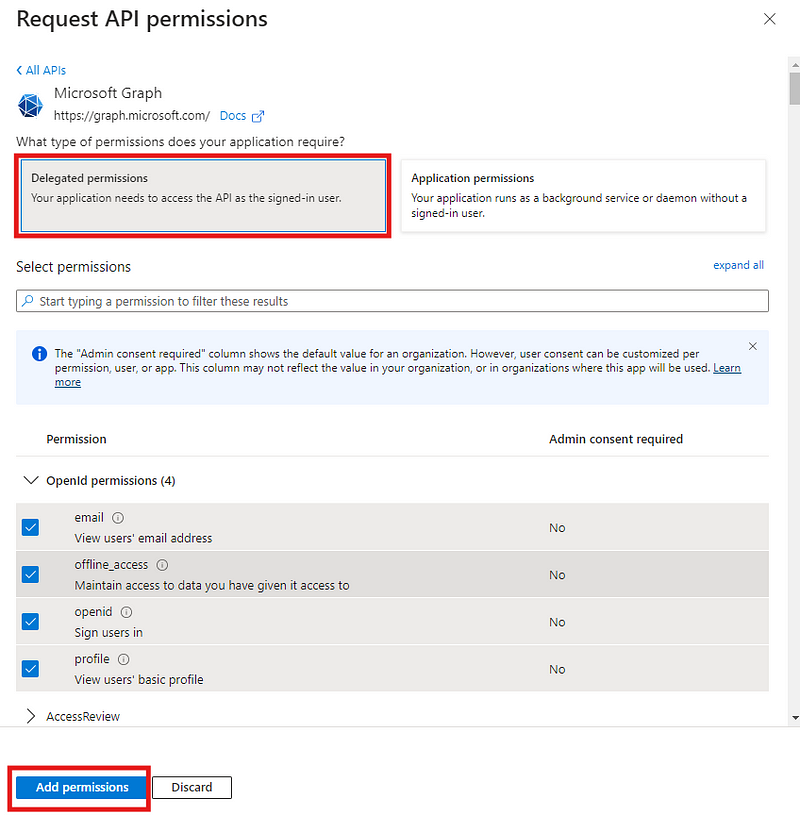
http://localhost:7007/api/auth/microsoft/handler/frameas the redirect URL. (You can add additional URLs for production later.)Go to Manage > API Permissions, and add the following Delegated permissions to Microsoft Graph:
emailoffline_accessopenidprofileUser.Read
 Applying permissions
 Selecting permissions
Step 3: Configure Backstage to Use Entra ID
Add your App Registration details to the app-config.yaml file, located in your project’s root directory.
1
2
3
4
5
6
7
8
9
10
11
12
auth:
  environment: development
  providers:
    microsoft:
      development:
        clientId: ${AZURE_CLIENT_ID}
        clientSecret: ${AZURE_CLIENT_SECRET}
        tenantId: ${AZURE_TENANT_ID}
        domainHint: ${AZURE_TENANT_ID}
        signIn:
          resolvers:
            - resolver: userIdMatchingUserEntityAnnotation
📌 The values for
clientId,tenantId, anddomainHintcan be found on the Overview page of your App Registration in Entra ID.
📌 TheclientSecretis created under Certificates & Secrets.
Security Warning: Never store
clientSecretdirectly in the code. Use environment variables for production environments.
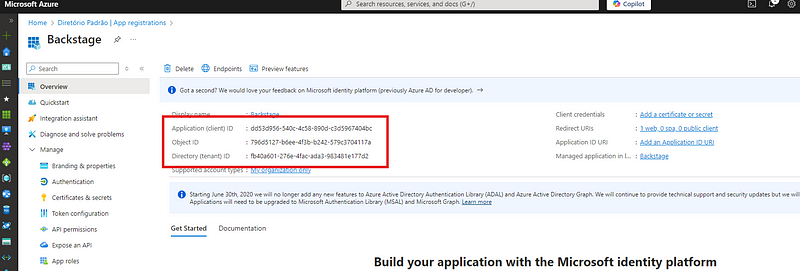 clientId, tenantId and domainHint
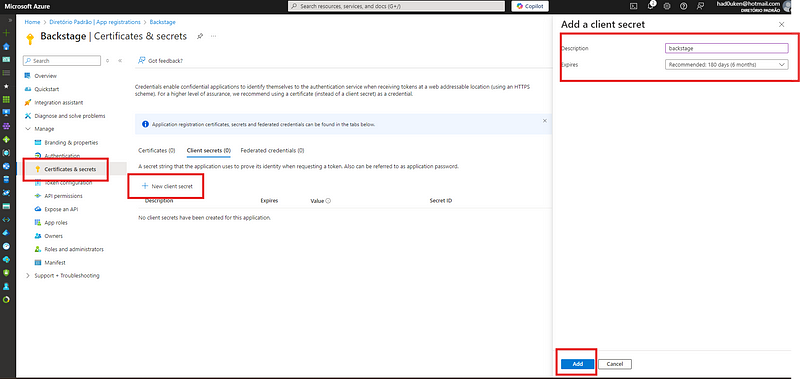 Creating password (clientSecret)
Copying password
Step 4: Configure the Backend
Install the Microsoft provider module by running the following command in the project’s root directory:
1
yarn --cwd packages/backend add @backstage/plugin-auth-backend-module-microsoft-provider
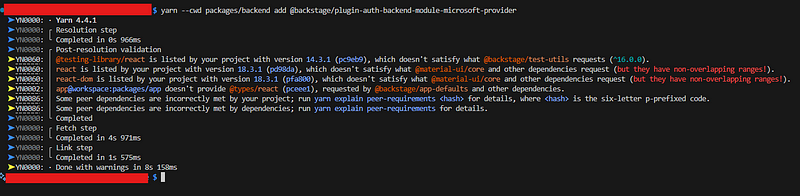 Installing provider
Then, edit packages/backend/src/index.ts and add the following lines:
1
2
3
4
5
6
7
8
import { createBackend } from '@backstage/backend-defaults';

const backend = createBackend();

// Microsoft provider
backend.add(import('@backstage/plugin-auth-backend-module-microsoft-provider'));

backend.start();
Step 5: Configure the Frontend
This page contains the documentation to add the IDP to the frontend. To do so, modify the file packages/app/src/App.tsx in order to take two actions:
- Import a component;
- Add the MS Entra ID button in the GUI.
To make it easier, the code excerpt below includes the changes already in place. Identify and replace the code as needed:
1
2
3
4
5
6
7
8
9
10
11
12
13
14
15
16
17
18
19
20
21
import { microsoftAuthApiRef } from '@backstage/core-plugin-api';

const app = createApp({
  apis,
  components: {
    SignInPage: props => (
      <SignInPage
        {...props}
        providers=[
          'guest',
          {
            id: 'microsoft-auth-provider',
            title: 'Microsoft',
            message: 'Sign in using Entra ID',
            apiRef: microsoftAuthApiRef,
          },
        ]
      />
    ),
  },
});
Once this is done, you should see the Microsoft login button on the Backstage UI.
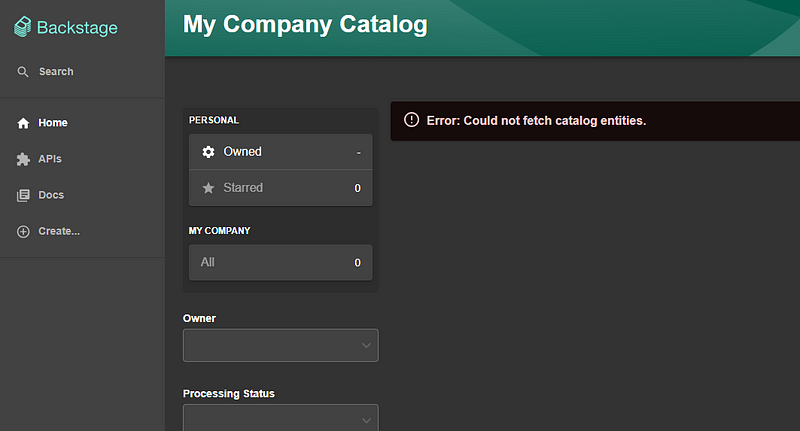
However, authentication will fail at this point because Backstage does not recognize the user in its catalog. This leads us to the next step.
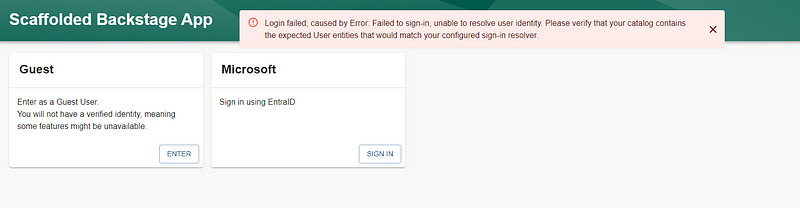 Authentication error
Step 6: Add Users to the Backstage Catalog
For this tutorial, we will manually create a user in the catalog. However, you can automate user ingestion via Microsoft Graph (check documentation here).
Edit the file examples/org.yaml, adding the following snippet at the end:
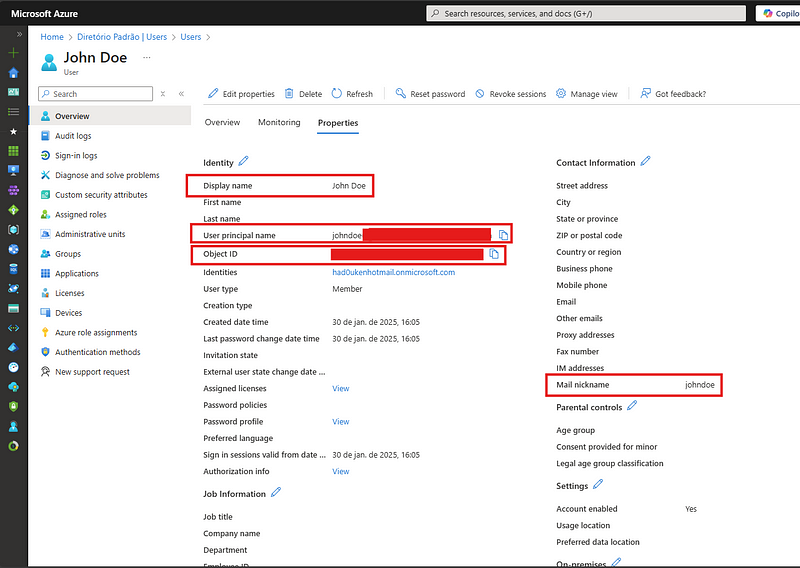 User information
1
2
3
4
5
6
7
8
9
10
11
12
apiVersion: backstage.io/v1alpha1
kind: User
metadata:
  name: johndoe
  annotations:
    graph.microsoft.com/user-id: aaaaaaa-aaaa-aaaa-aaaa-aaaaaaaaaaa
spec:
  profile:
    displayName: John Doe
    email: johndoe@mydomain.com
  memberOf:
    - guests
📌 Notes:
metadata.name: Mail nickname (value before @yourdomain.com).metadata.annotations.graph.microsoft.com/user-id:Object IDof the user.displayName: Full name of the user.
Final Thoughts
If everything is configured correctly, you should now be able to run Backstage locally and authenticate via Entra ID. 🎉
🚀 Next Steps: In the upcoming post, we’ll explore integrating Backstage with Azure DevOps and setting up templates to further automate your developers’ workflows.
📩 Questions or suggestions? Drop them in the comments!