Integrating Backstage and Azure DevOps
Automate the resource delivery in Azure integrating Backstage and Azure DevOps. A step-by-step guide about configuring, templates and pipelines.
Introduction
This is the second post I am writing about Backstage. Check out the first one, where I discuss integration with Entra ID here. Now, let’s walk through all the steps to integrate Backstage and Azure DevOps to automate resource delivery in Azure using a CI/CD pipeline. Be prepared, because this one is going to be long!
I’ll keep a repository on my GitHub with the Backstage code resulting from these two posts and will also make available the files we will use here.
Summary
- Introduction
- Summary
- Create a PAT for use
- Configure Backstage to use the PAT
- Install the Azure DevOps Plugin
- Create the template for use by Backstage
- Create the Terraform code
- Create the pipeline to execute the code
- Final Test
- Conclusion
Note: Having Entra ID as an IDP is not a prerequisite for working with Azure DevOps. However, it is common for both solutions to be used in a Microsoft environment.
For this post, I created a new project in Azure DevOps called Backstage, where we will store our Backstage template, Terraform code, and the yaml file to create our pipeline.
Attention: I will assume that you already know how to create a project, repository, and use the minimum necessary git commands.
In this link you can check the Backstage documentation for this integration. Backstage supports the use of managed identity, service principal, and PAT. For the purpose of this post, I will use PAT as it is simpler.
Create a PAT for use
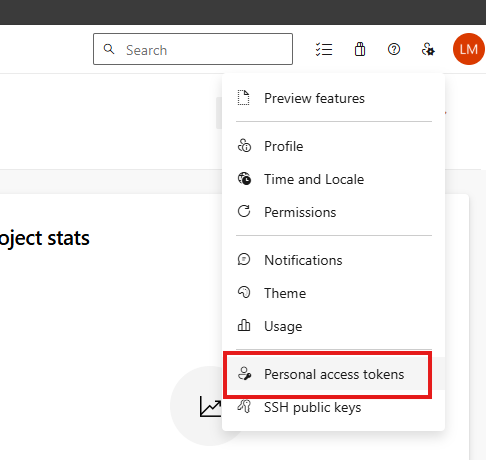
To create your token, go to the upper right corner of Azure DevOps and click on User settings and then Personal access tokens:
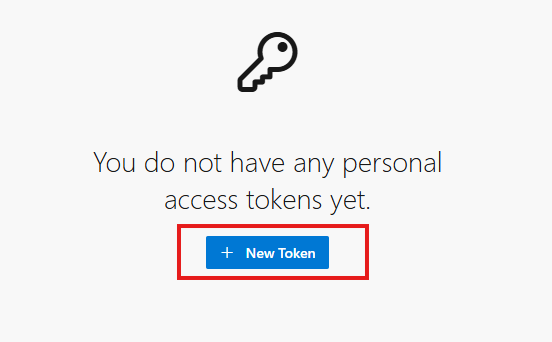
Click on New Token:
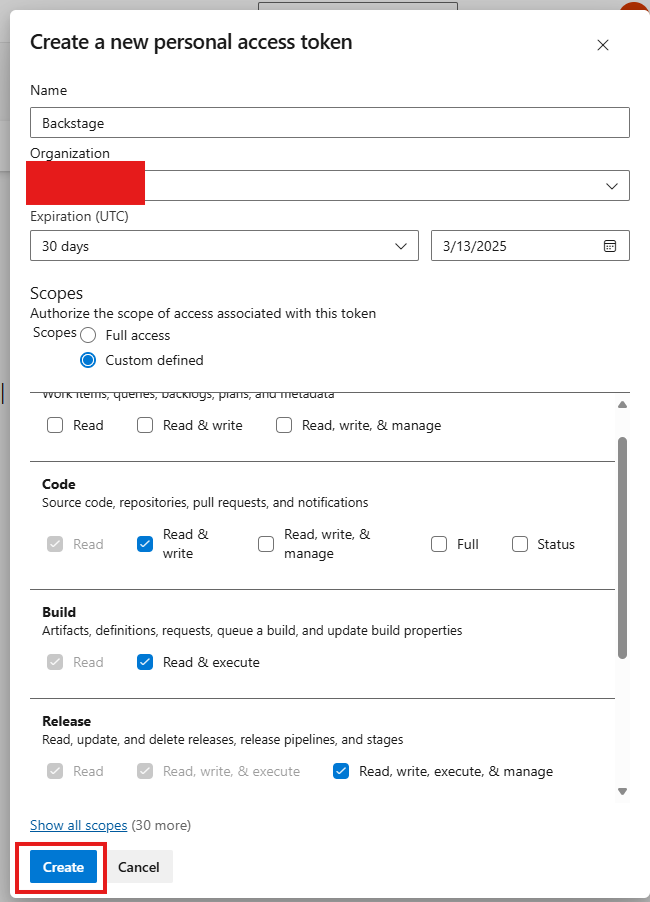
Give a name to the PAT and configure the necessary permissions. Then confirm the creation:
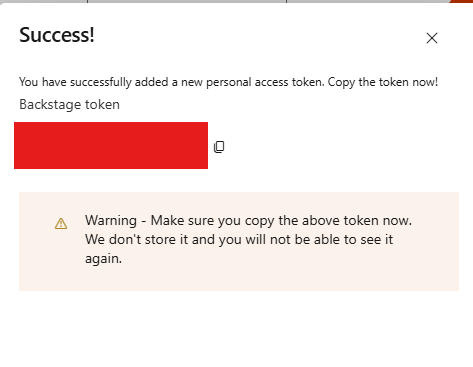
Copy the token and save it somewhere, as you will not be able to retrieve it again:
Configure Backstage to use the PAT
Add the PAT to Backstage
Now let’s go back to the Backstage code to modify the app-config.yaml file. With it open, add the code snippet below to the integrations section:
1
2
3
4
5
integrations:
  azure:
    - host: dev.azure.com
      credentials:
        - personalAccessToken: ${PERSONAL_ACCESS_TOKEN}
Test the integration functioning
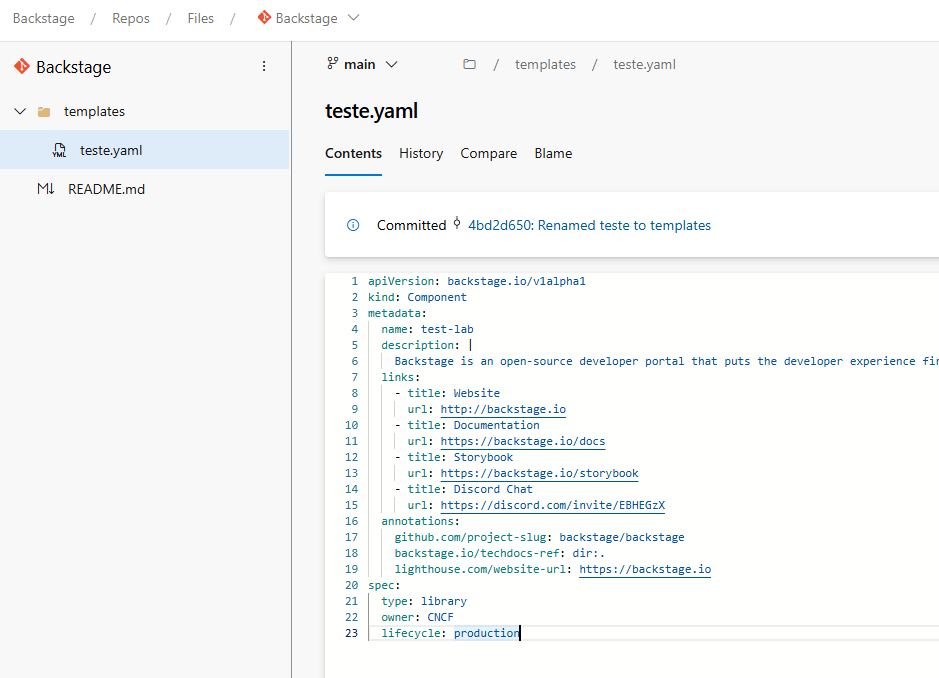
With that configured, it should already be possible to test Backstage’s access to your Azure DevOps repository. To test this, let’s store a test template file inside our repository, in a folder called template. After that, we will try to import this template into Backstage. Below, I’ll provide a sample file that I took from the Backstage documentation and only changed the name field.
1
2
3
4
5
6
7
8
9
10
11
12
13
14
15
16
17
18
19
20
21
22
23
apiVersion: backstage.io/v1alpha1
kind: Component
metadata:
  name: test-lab
  description: |
    Backstage is an open-source developer portal that puts the developer experience first.
  links:
    - title: Website
      url: http://backstage.io
    - title: Documentation
      url: https://backstage.io/docs
    - title: Storybook
      url: https://backstage.io/storybook
    - title: Discord Chat
      url: https://discord.com/invite/EBHEGzX
  annotations:
    github.com/project-slug: backstage/backstage
    backstage.io/techdocs-ref: dir:.
    lighthouse.com/website-url: https://backstage.io
spec:
  type: library
  owner: CNCF
  lifecycle: production
Now, go to Azure DevOps and create a folder called
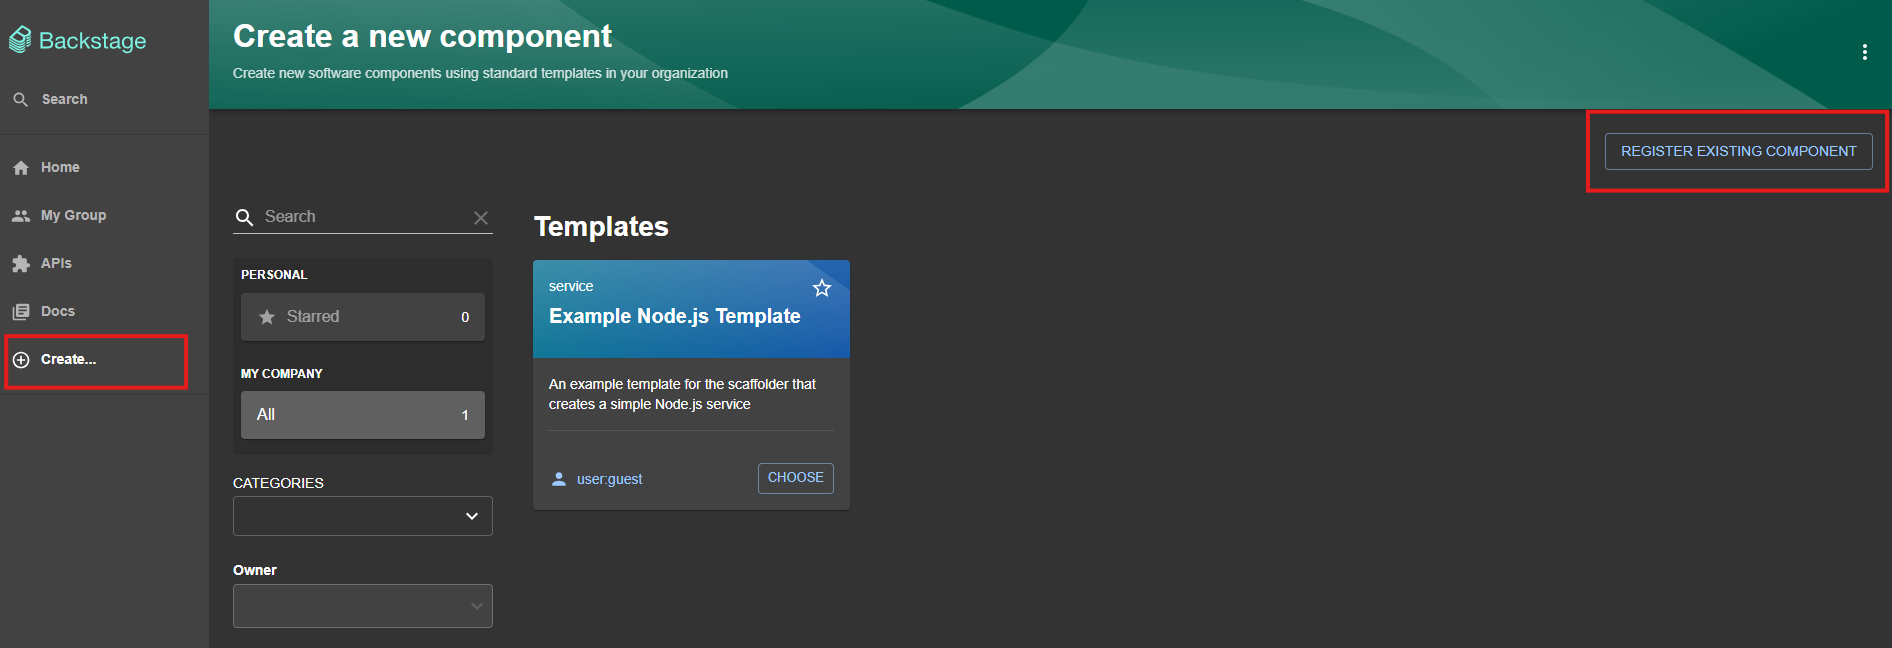
templatesand create a new file, adding the code above and naming ittest.yaml. Confirm the Commit to create the file and copy the URL that leads directly to it.After copying the URL, go back to Backstage and go to the Create… menu and click on the Register Existing Component option:
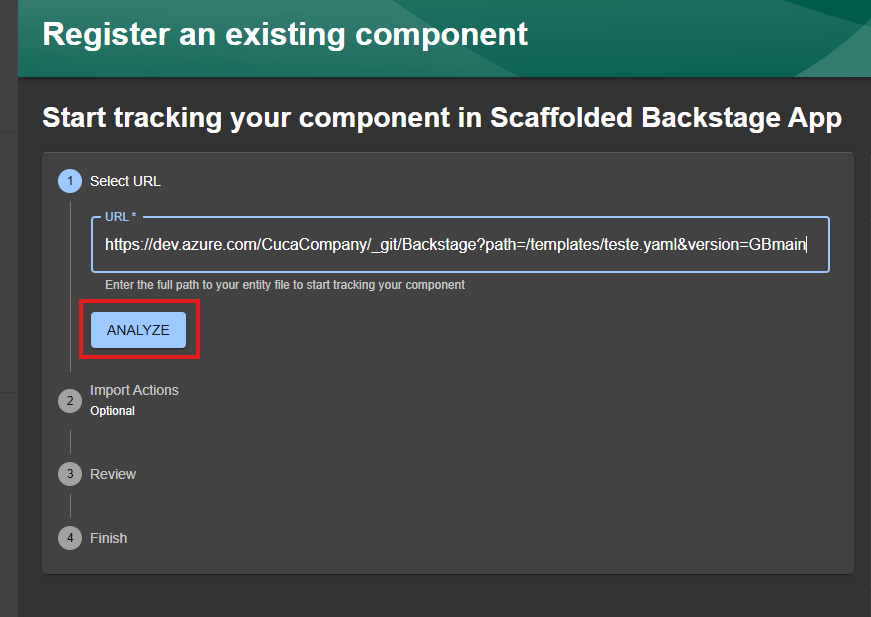
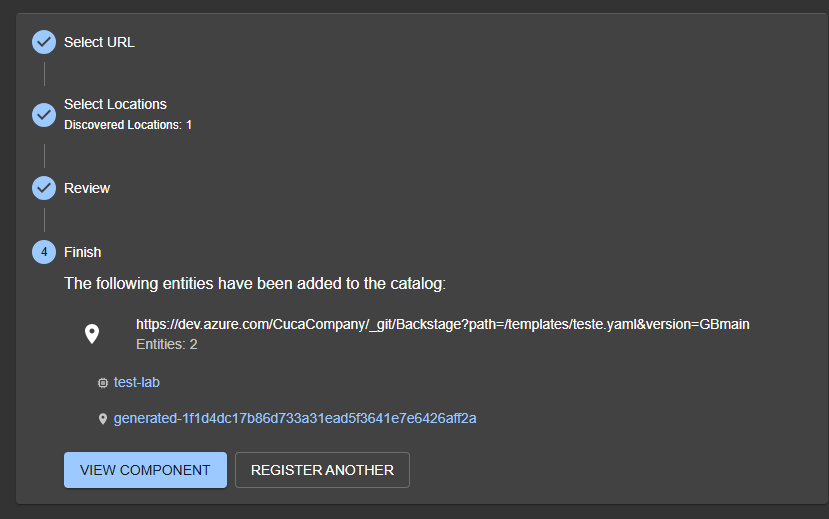
Paste the URL of the file we just created and select Analyze. If the integration is functional, Backstage will be able to read the file from Azure DevOps and import it. Confirm the import.
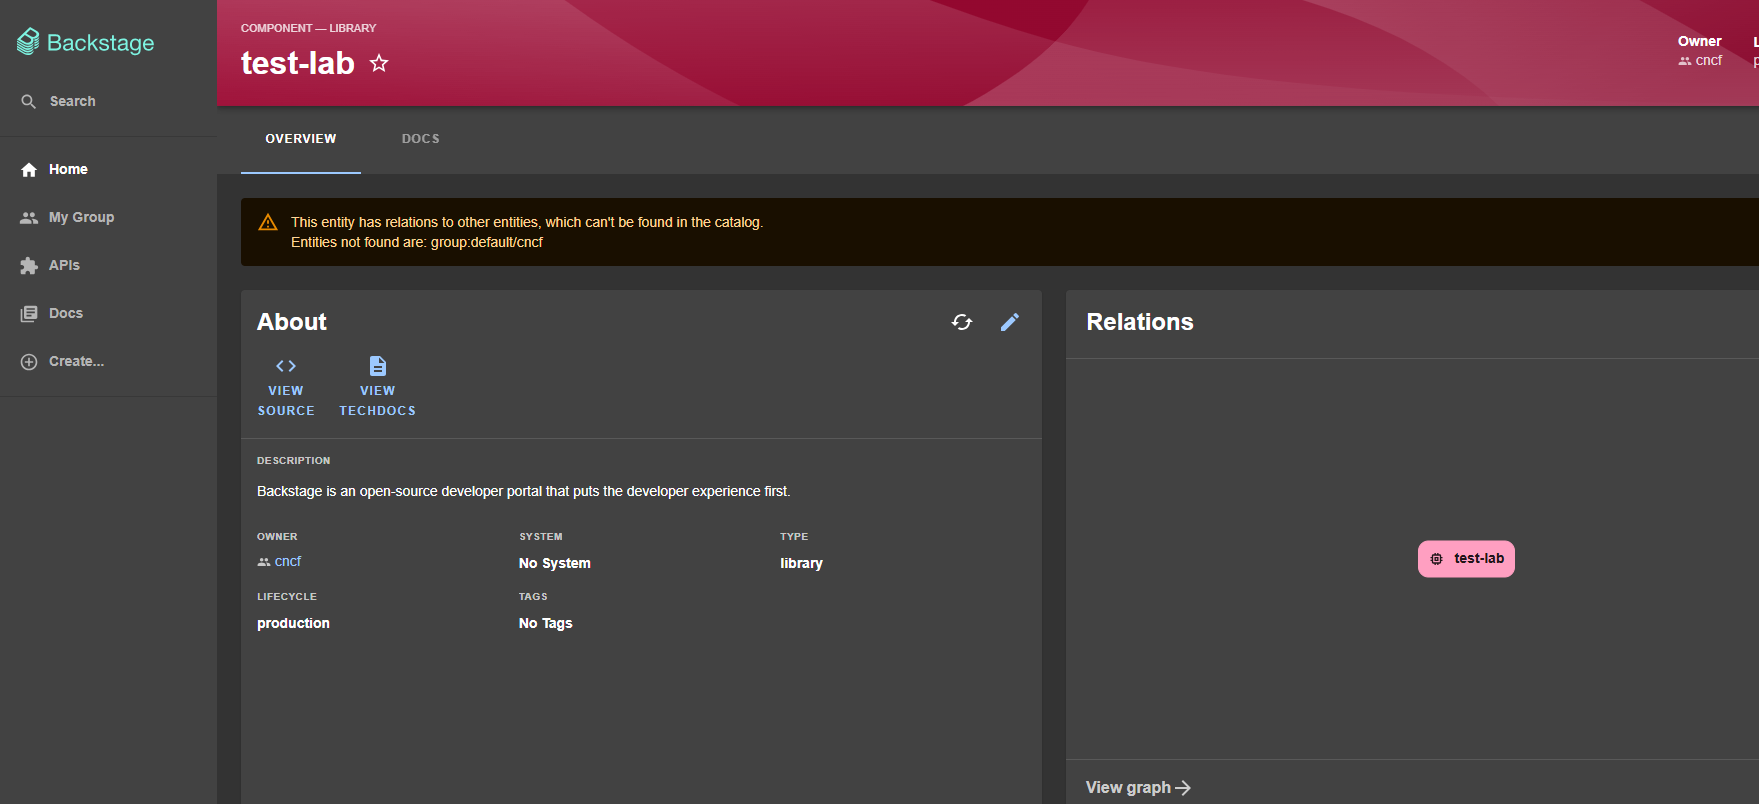
Clicking on View Component you will be able to see the information of the component you just imported, named
test-lab:
Congratulations, the integration with Azure DevOps is working!
Install the Azure DevOps Plugin
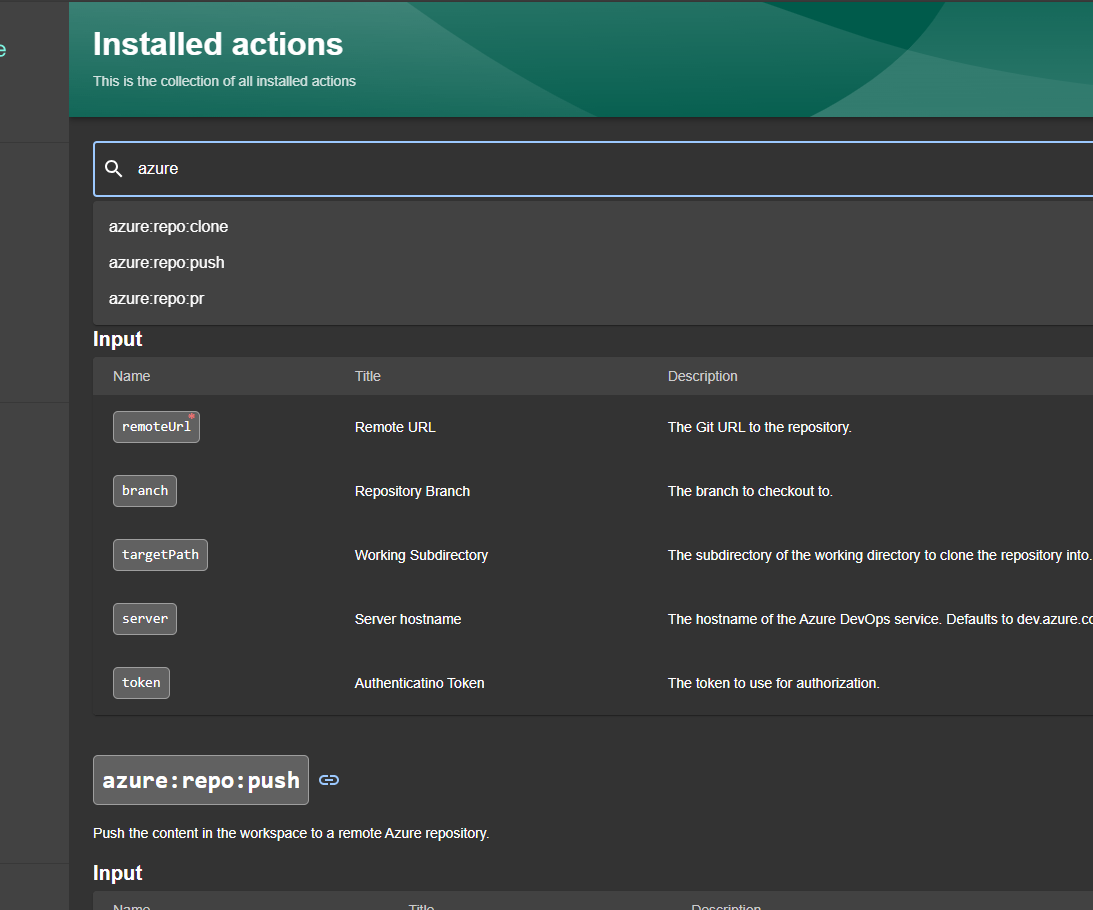
For our Backstage template to work properly, we will need the actions azure:repo:clone, azure:repo:push, and azure:repo:pr. These actions will be taken by the template to download the code, then push it, and finally create a pull request. To check if they are already installed, you can go to Create and then, in the upper right corner, select Installed Actions.
To enable them, run the command below from the root of your project. Here is the plugin page.
1
yarn --cwd packages/backend add @parfuemerie-douglas/scaffolder-backend-module-azure-repositories
Then, add the code below to the packages/backend/src/index.ts file:
1
2
// Azure DevOps
backend.add(import('@parfuemerie-douglas/scaffolder-backend-module-azure-repositories'))
Create the template for use by Backstage
Now that we have Backstage ready to communicate with Azure DevOps and the necessary plugins installed, let’s create the template, which is nothing more than the form that will receive the requester’s data for resource provisioning. I will provide a very simple template model, where the user will be asked to provide their name and the name of the resource group they want to create.
One of the things I had the most difficulty with was finding the necessary information to achieve the expected result using the template. Here is a very simple template model.
1
2
3
4
5
6
7
8
9
10
11
12
13
14
15
16
17
18
19
20
21
22
23
24
25
26
27
28
29
30
31
32
33
34
35
36
37
38
39
40
41
42
43
44
45
46
47
48
49
50
51
52
53
54
55
56
57
58
59
60
61
62
63
64
65
66
67
68
69
# Template for creating a new Azure DevOps repository and pushing a new Backstage component to it.

apiVersion: scaffolder.backstage.io/v1beta3
kind: Template
metadata:
  name: azure-repo-demo
  title: Azure Repository Test
  description: Clone and push to an Azure repository example.
spec:
  owner: parfuemerie-douglas
  type: service

  parameters:
    - title: Fill in some steps
      required:
        - name
      properties:
        name:
          title: RG Name
          type: string
          description: Choose a unique resource-group name.

  steps:
    - id: cloneAzureRepo
      name: Clone Azure Repo
      action: azure:repo:clone
      input:
        remoteUrl: "https://<MY_AZURE_ORGANIZATION>@dev.azure.com/<MY_AZURE_ORGANIZATION>/<MY_AZURE_PROJECT>/_git/<MY_AZURE_REPOSITORY>"
        branch: "main"
        targetPath: ./sub-directory

    - id: fetch
      name: Template Skeleton
      action: fetch:template
      input:
        url: https://dev.azure.com/<MY_AZURE_ORGANIZATION>/<MY_AZURE_PROJECT>/_git/<MY_AZURE_REPOSITORY>?path=/terraform/base
        targetPath: ./sub-directory/terraform/changed
        replace: true
        values:
          name: ${{ parameters.name }}

    - id: pushAzureRepo
      name: Push to Remote Azure Repo
      action: azure:repo:push
      input:
        branch: <MY_AZURE_REPOSITORY_BRANCH>
        sourcePath: ./sub-directory
        gitCommitMessage: Add name: ${{ parameters.name }} project files

    - id: pullRequestAzureRepo
      name: Create a Pull Request to Azure Repo
      action: azure:repo:pr
      input:
        sourceBranch: <MY_AZURE_REPOSITORY_BRANCH>
        targetBranch: "main"
        repoId: <MY_AZURE_REPOSITORY>
        title: ${{ parameters.name }}
        project: <MY_AZURE_PROJECT>
        organization: <MY_AZURE_ORGANIZATION>
        description: "This is a pull request from Backstage"
        supportsIterations: false

  output:
    links:
      - title: Repository
        url: "dev.azure.com?owner=<MY_AZURE_PROJECT>&repo=<MY_AZURE_REPOSITORY>&organization=<MY_AZURE_ORGANIZATION>"
      - title: Open in catalog
        icon: catalog
        entityRef: ${{ steps.register.output.entityRef }}
Important Note about Templates:
When using relative paths for file handling in Backstage, it always starts from the location where the template was imported.
In other words, it always concatenates the path you provide with the path from where the template was imported. Thus, either you keep the files to be handled in the same location as the file from which you imported the template or use a URL from an external location, which is the approach I used here in the fetch:template action. More about this can be seen here and here.
Returning to our process, create the template file in Azure DevOps (replacing the necessary fields) and then go to Backstage and follow the same import process we did before in the integration test. When importing the template, you might encounter the error below:
If this happens, it is because Backstage is not allowing resources of type Template to be imported. To fix this, edit the app-config.yaml file, adding Template to the allow list:
Once the template is imported, it should appear in the Create… menu: 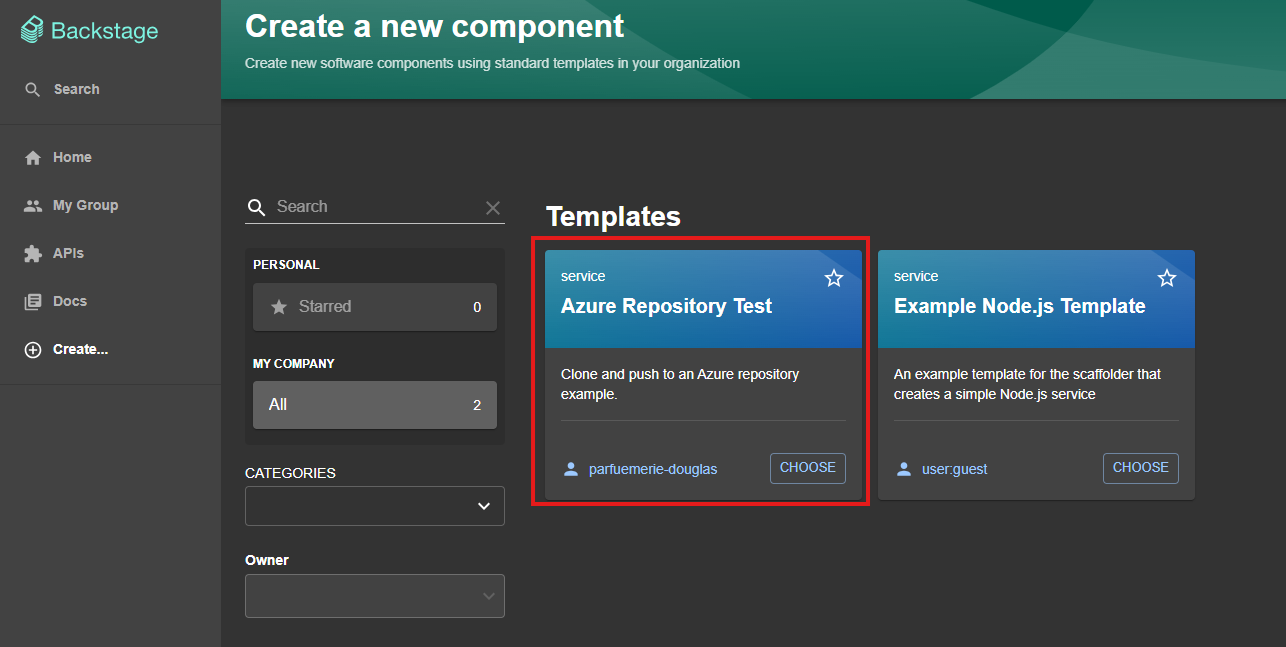 New template available
Create the Terraform code
Okay, now that we know Backstage and Azure DevOps are communicating, let’s create a simple code that will be used by our pipeline to create a resource in Azure. There is nothing simpler than a resource group, so let’s go this route.
The minimum code for this to work is as follows:
1
2
3
4
5
6
7
8
provider "azurerm" {
  features {}
}

resource "azurerm_resource_group" "example" {
  name     = "${{ values.name }}"
  location = "<AZ_LOCATION>"
}
I am not using a storage account here to store your Terraform state! For production environments, I suggest storing the state in a secure location.
Pay attention to the name variable, as it will be filled with the value coming from Backstage. Here we are making a very simple example using only one variable, but extrapolate this idea to any code you want to execute.
Once the Terraform code is created, upload it to our Azure DevOps repository.
Important: since the idea is for Backstage to handle this file and then upload it and subsequently create a Pull Request of code, this (containing the
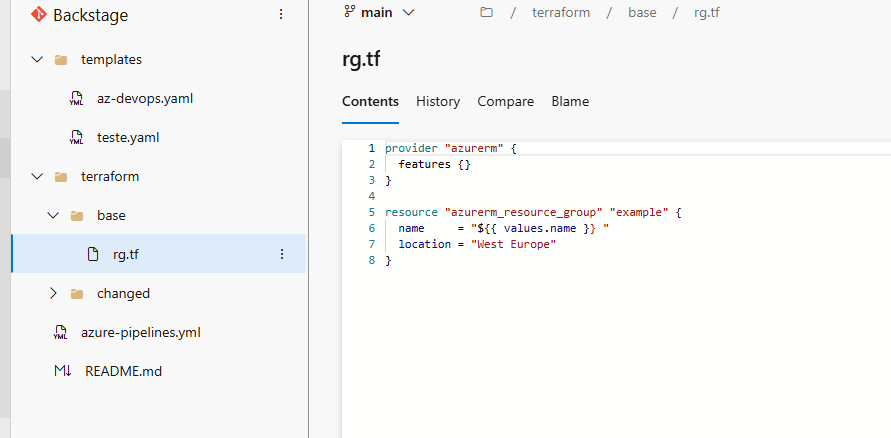
namevariable) will be replaced by the value coming from Backstage, making the code non-reusable. To avoid this, we will separate the code with the variable, which we will callbase, from the code that will have the variable filled, which we will callchanged, for simplicity. This way, we will always have a place with the code ready to be used.
Below is the approach I find the simplest, but feel free to adapt it to your needs:
Create the pipeline to execute the code
Finally, let’s create a pipeline that will be triggered whenever there is a change in the code. This will only happen when someone approves the pull request that Backstage will create.
Create a service connection
A service connection is required for Azure DevOps to create resources in Azure.
In the left menu, click on Service connections and then click on Create service connection. Then, in the right panel, select the Azure Resource Manager type:
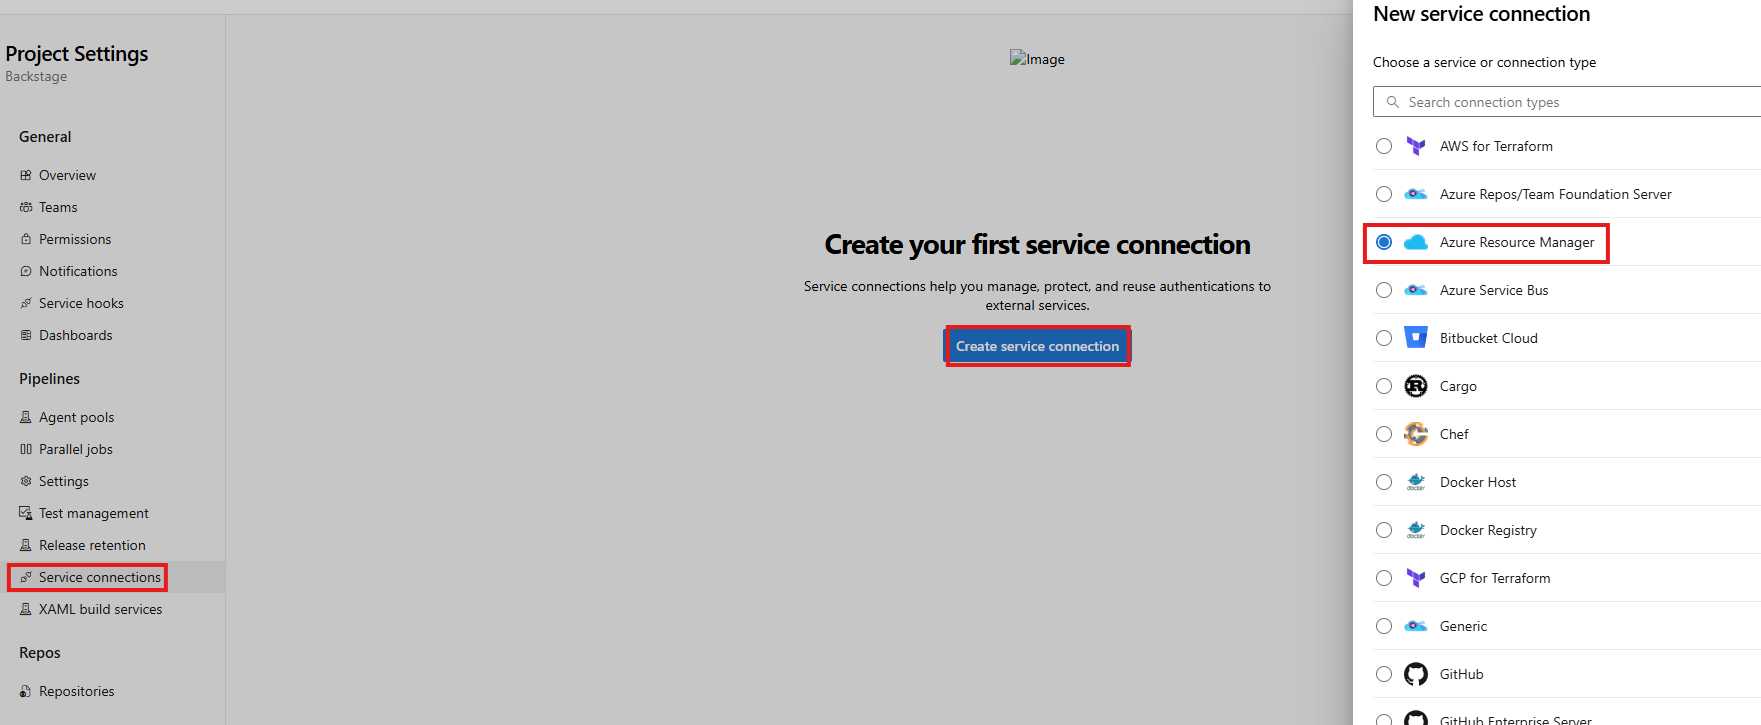 Creating service connection
You will need to authenticate in Azure to authorize the connection. Follow the process and fill in the left panel:
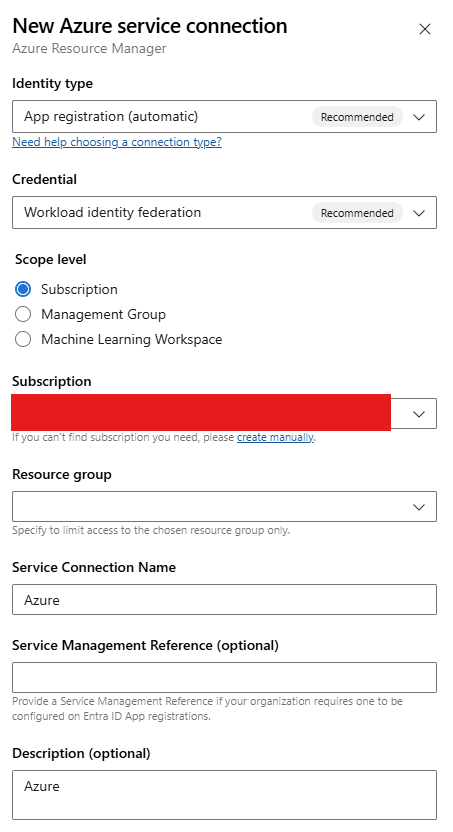 Configuring connection
If everything went well, you will see the created connection.
 Connection created
Create the pipeline in Azure DevOps
Go to Azure DevOps, in Pipelines. Then click on Create Pipeline:
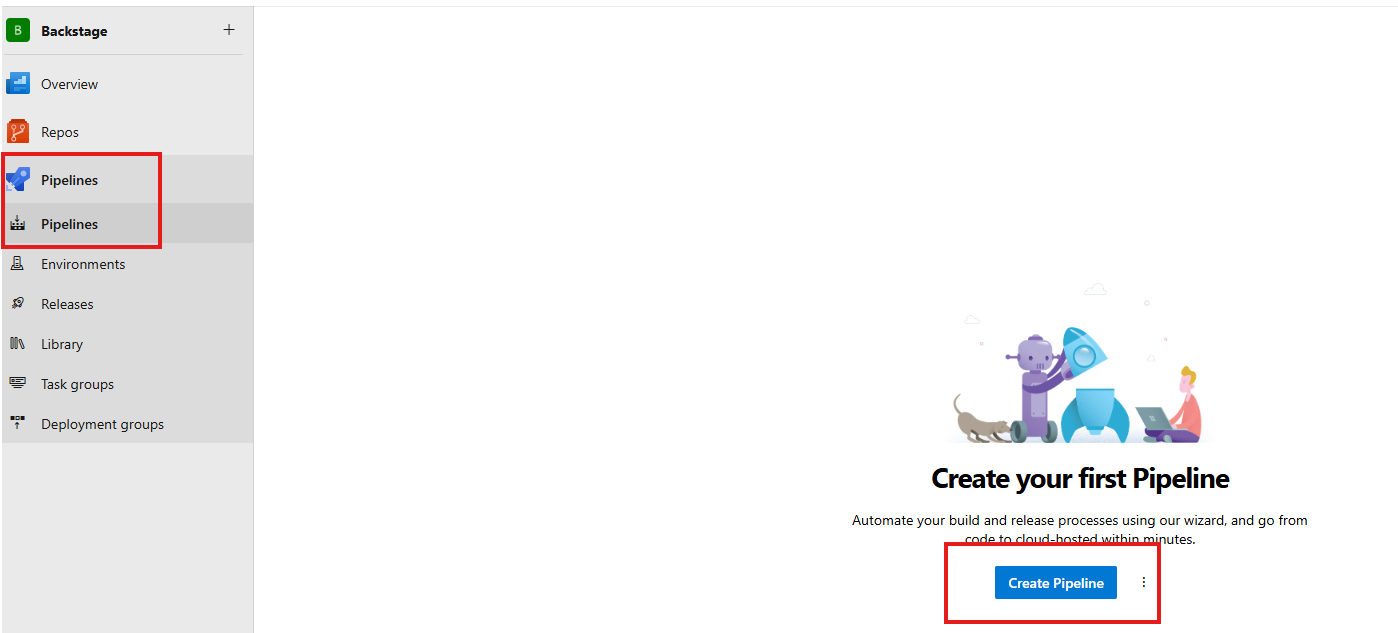 Creating pipeline
Select the location where your code is:
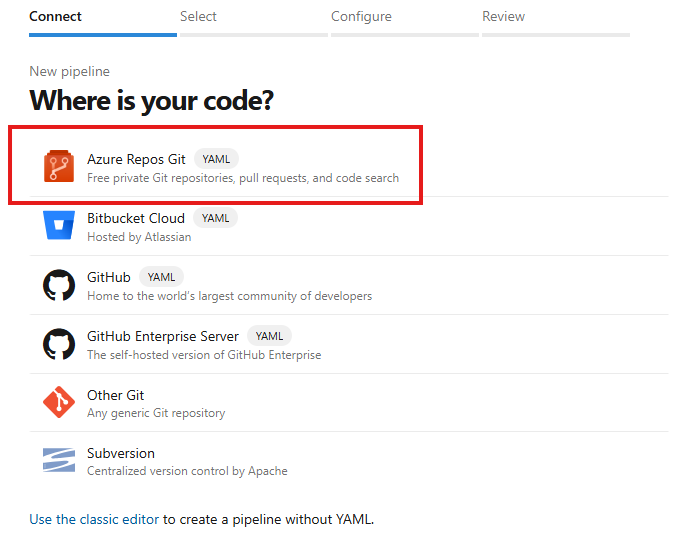 Selecting repository location
Select the repository in question:
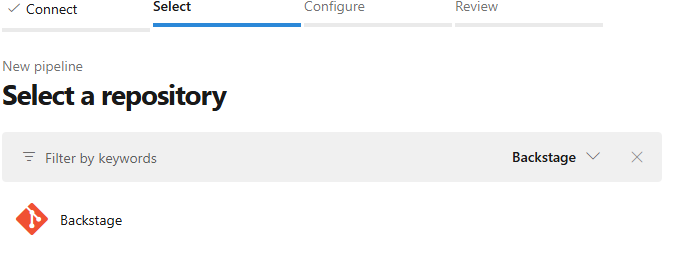 Select the repository in question
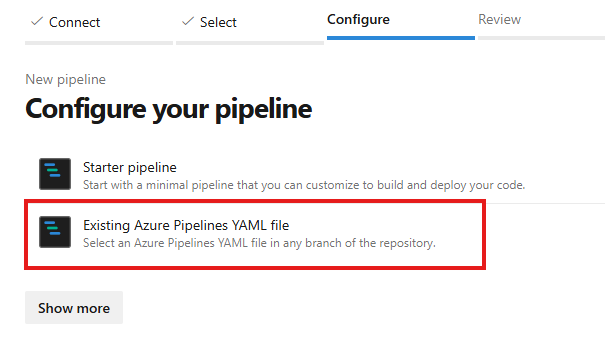
Paste the yaml below, replacing the necessary values (even if you do not store the terraform state somewhere, you will need to provide these details to use the
TerraformTaskV4@4action):
1
2
3
4
5
6
7
8
9
10
11
12
13
14
15
16
17
18
19
20
21
22
23
24
25
26
27
28
29
30
31
32
33
34
35
36
37
38
39
40
41
trigger:
- main

pool:
  vmImage: ubuntu-latest

steps:
- task: TerraformTaskV4@4
  displayName: Terraform Init
  inputs:
    provider: 'azurerm'
    command: 'init'
    backendServiceArm: '<SERVICE_CONNECTION_NAME>'
    backendAzureRmResourceGroupName: '<AZ_RG_NAME>'
    backendAzureRmStorageAccountName: '<AZ_SA_NAME>'
    backendAzureRmContainerName: '<AZ_SA_CONTAINER_NAME>'
    backendAzureRmKey: '<AZ_KEY_NAME>'
    workingDirectory: $(System.DefaultWorkingDirectory)/terraform/changed

- task: TerraformTaskV4@4
  displayName: Terraform Validate
  inputs:
    provider: 'azurerm'
    command: 'validate'
    workingDirectory: $(System.DefaultWorkingDirectory)/terraform/changed

- task: TerraformTaskV4@4
  displayName: Terraform Plan
  inputs:
    provider: 'azurerm'
    command: 'plan'
    environmentServiceNameAzureRM: '<SERVICE_CONNECTION_NAME>'
    workingDirectory: $(System.DefaultWorkingDirectory)/terraform/changed

- task: TerraformTaskV4@4
  displayName: Terraform Apply
  inputs:
    provider: 'azurerm'
    command: 'apply'
    workingDirectory: '$(System.DefaultWorkingDirectory)/terraform/changed'
    environmentServiceNameAzureRM: '<SERVICE_CONNECTION_NAME>'
Final Test
Well, with everything in place, we can finally test our entire environment. Go to Backstage, click on Create…, enter the name of the resource group you want to create, and confirm. This should make Backstage download the code, add the data you provided, and create a pull request in Azure DevOps, which you will need to approve. Once approved, the pipeline should run automatically. Let’s see this happen?
Go to the template and enter the name you want for the resource group:
Review what you entered:
If everything is okay, confirm and wait for the execution:
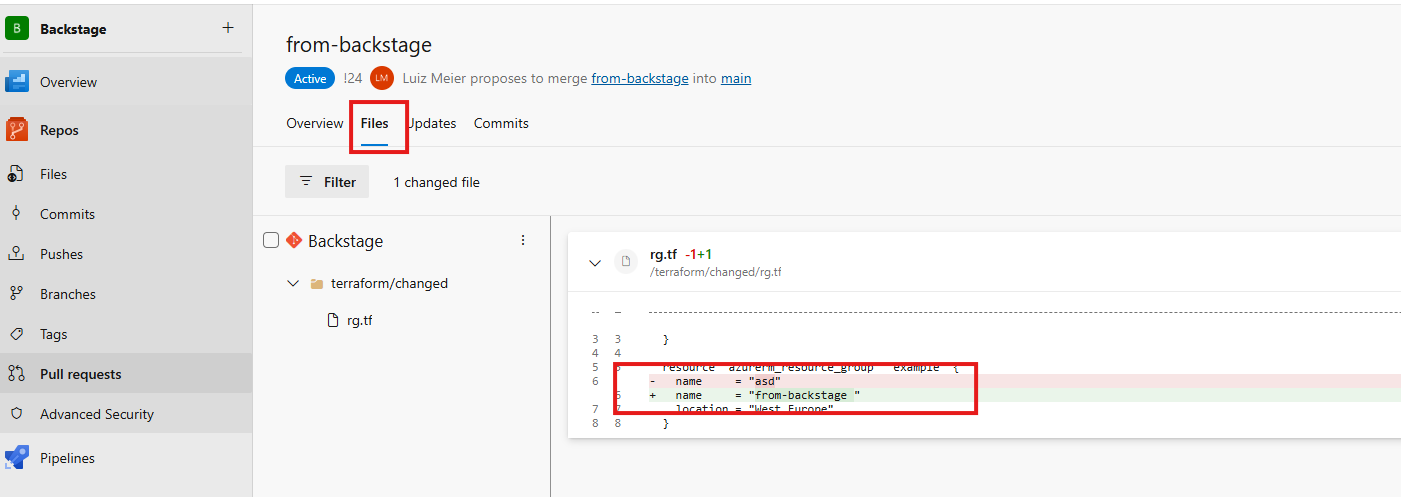
After the execution, go to Azure DevOps and see the created Pull Request. You can even validate the files that were changed and included in the PR.
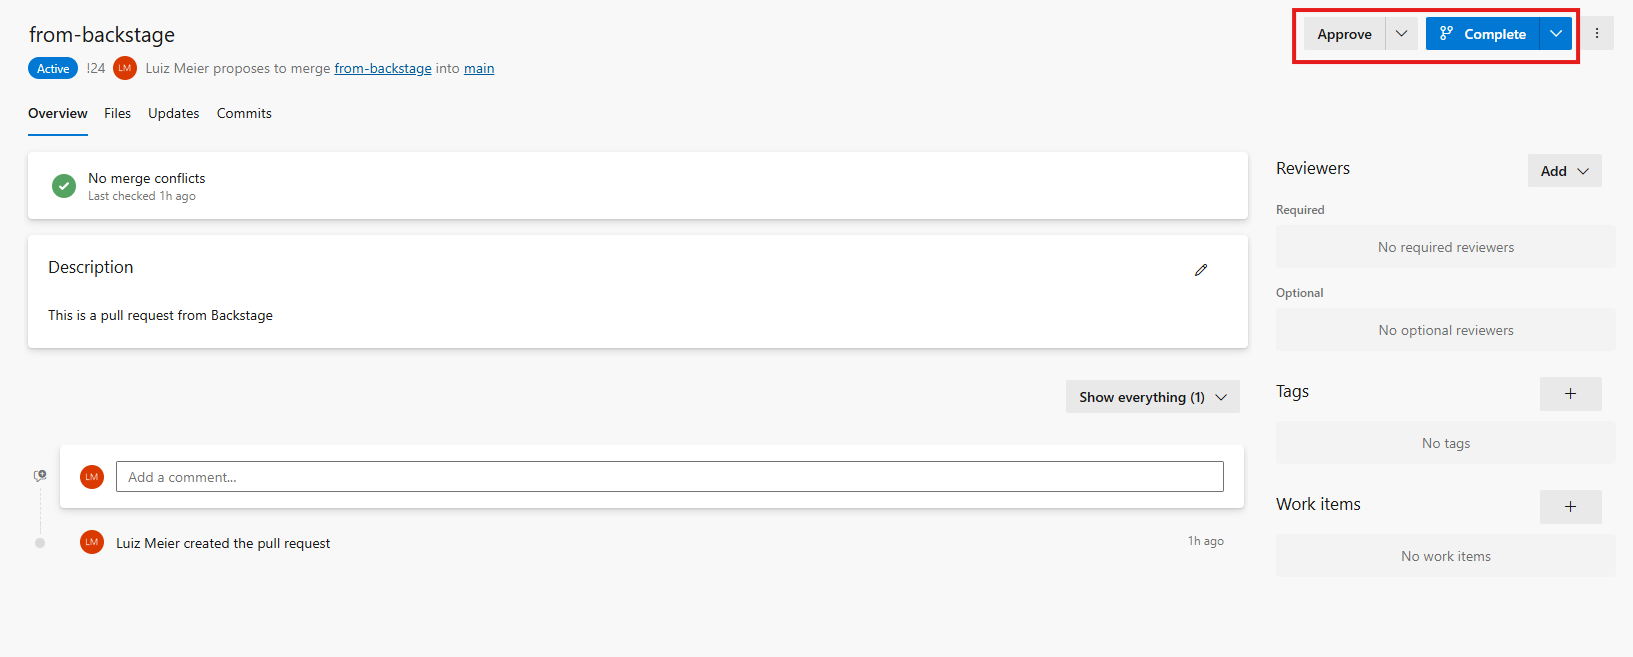
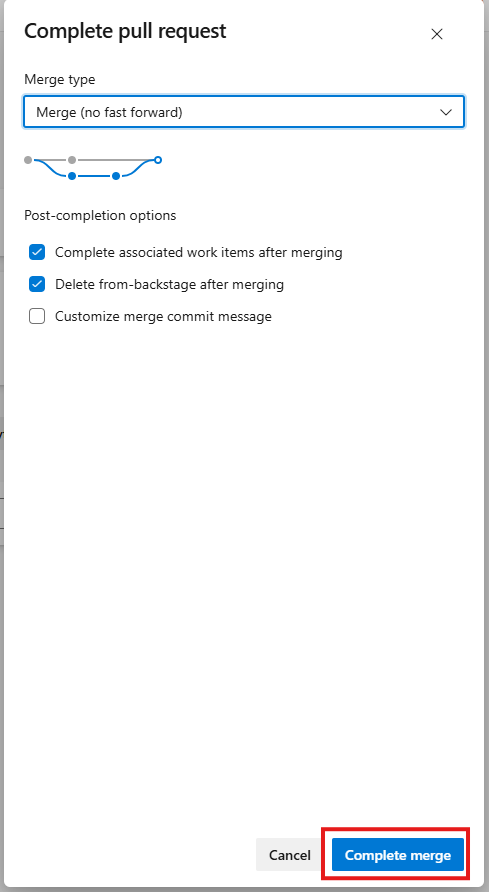
If everything is okay, approve the PR and complete it.
Here it is interesting to mention that the setup model is very customizable. Your company may prefer not to have approval, or it may want more than one approval. For all these scenarios, you should adjust the environment to the need. The intention here was to show the concept and how to put it into practice.
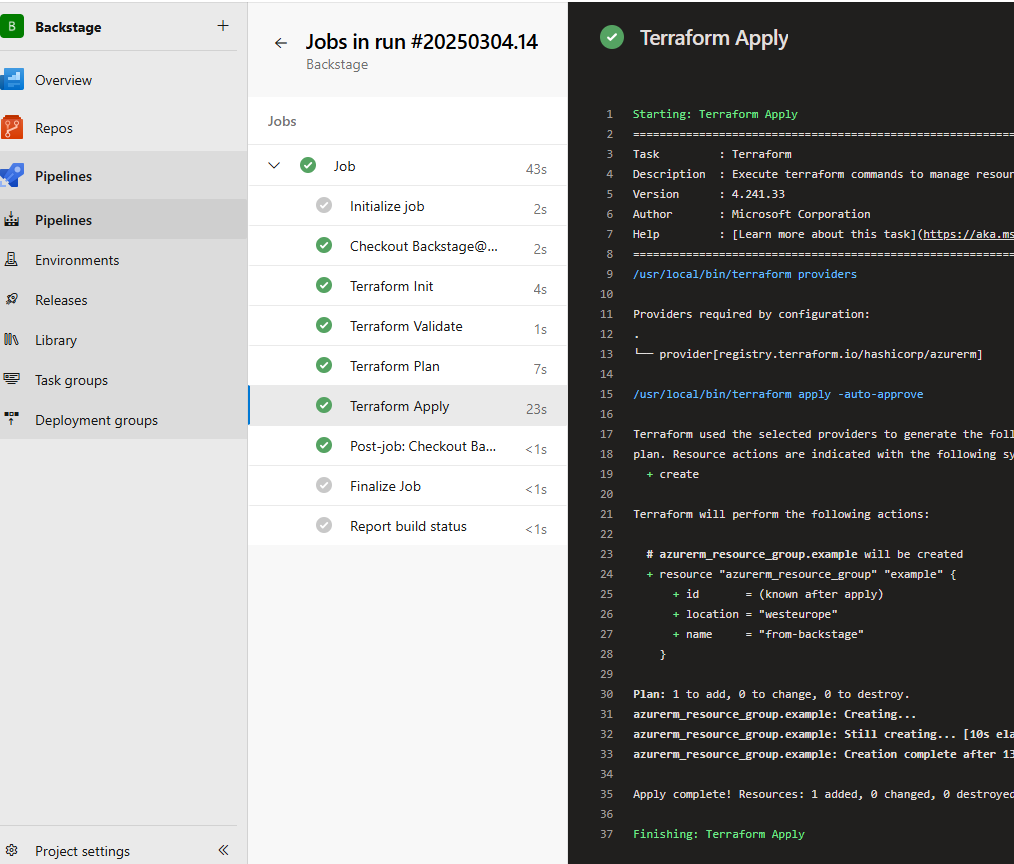
After the change is approved, go to the pipeline and follow the result. It should run without problems and create your resource in Azure.
If everything went as expected, you should see your resource created in the Azure console.
Conclusion
In this post, you learned how to integrate Backstage with Azure DevOps and set up an automated workflow for resource provisioning. We covered everything from configuring the PAT, integrating Backstage with Azure DevOps, to validating the connection with a sample template.
With this foundation, you can expand this implementation to meet the specific needs of your environment, further automating the infrastructure management process.
Now, it’s your turn to explore new possibilities and adapt this workflow to make development and operations more efficient.
If you have any questions or suggestions, share them in the comments!

