How I Recovered a Bricked CCTV Camera
A Last-Resort Guide to Try Before Losing Your Equipment
A few weeks ago, I had a problem with two CCTV cameras (from a Brazilian vendor) that suddenly bricked. Although there are thousands of posts and videos on YouTube explaining how to reset, configure, reset passwords, etc., I couldn’t find any that provided information on how to try to recover the equipment if it doesn’t start.
I’m going to assume that you are already familiar with basic computer networking, CCTV, and a bit of electronics. If you decide to follow the same steps I did, I DO NOT take any responsibility for any damage this may cause to your equipment.
Diagnosing
I noticed (after several days) that the cameras had stopped working, so I removed them from their location to take a closer look, already expecting them to be fried. I powered them and connected them to my router, then realized that the network interface on the router was turning on and off every few seconds. That gave me some hope because it made me think something was still alive in the camera, causing it to reboot periodically.
To try diagnosing the issue, I connected the camera directly to my laptop and used Wireshark to capture the network traffic, hoping to find clues about this behavior.
In the image above some hints come up:
- Packet 14 shows that the camera is looking for the gateway 192.168.1.1 and asking it to be announced to
192.168.1.108, which is the address the camera assigned to its own network interface. After learning that, I set the address192.168.1.1on my laptop’s network interface. - Packet 16 shows that the camera, via TFTP, tries to download the file
upgrade_info_7db780a7134a.txtfrom the server192.168.254.254. With that in mind, I also added the address 192.168.254.254 to my laptop’s network interface. If the desired file isn’t found, the camera attempts to download a file namedfailed.txt.
This behavior is quite common when equipments can’t find its operating system and tries to boot from the network using a TFTP server. I began to think that maybe its storage was fried or malfunctioning. So, I started researching the file upgrade_info_7db780a7134a.txt. From that point, things became clearer because there’s a lot of information about it. Apparently, this vendor uses the same equipment (or at least the same bootloader) as a Chinese vendor called Dahua.
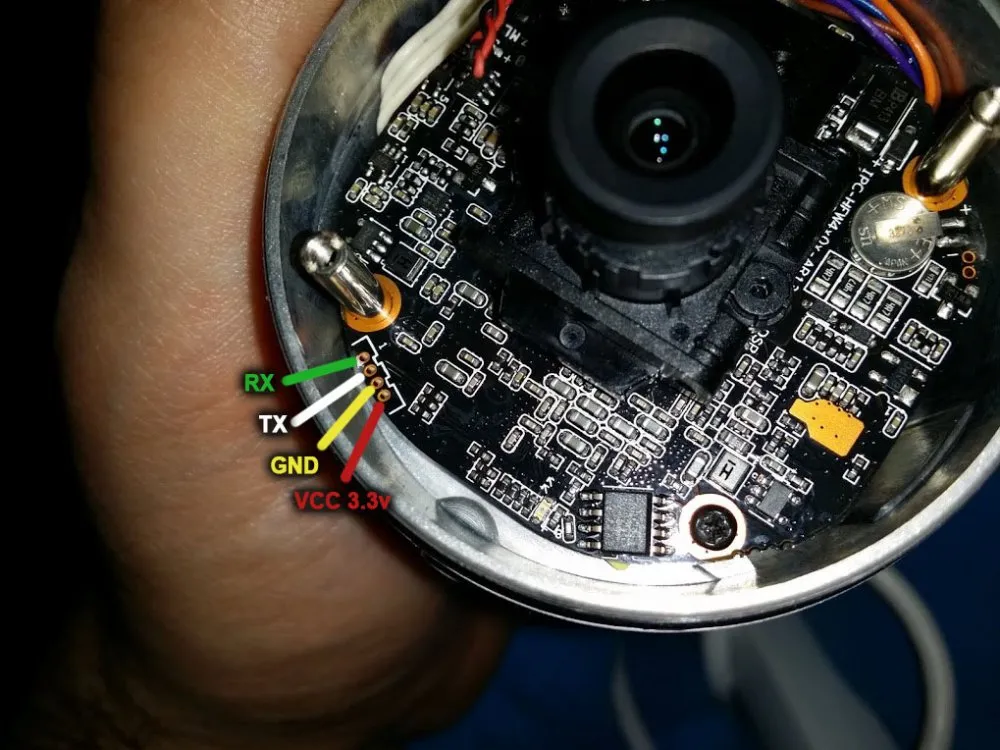
After browsing several forums, I found some that described a procedure to manually upgrade the firmware using the serial port. Once I opened one of the cameras, I located the serial ports, as pointed out in this link. Below is a picture with the ports identified:
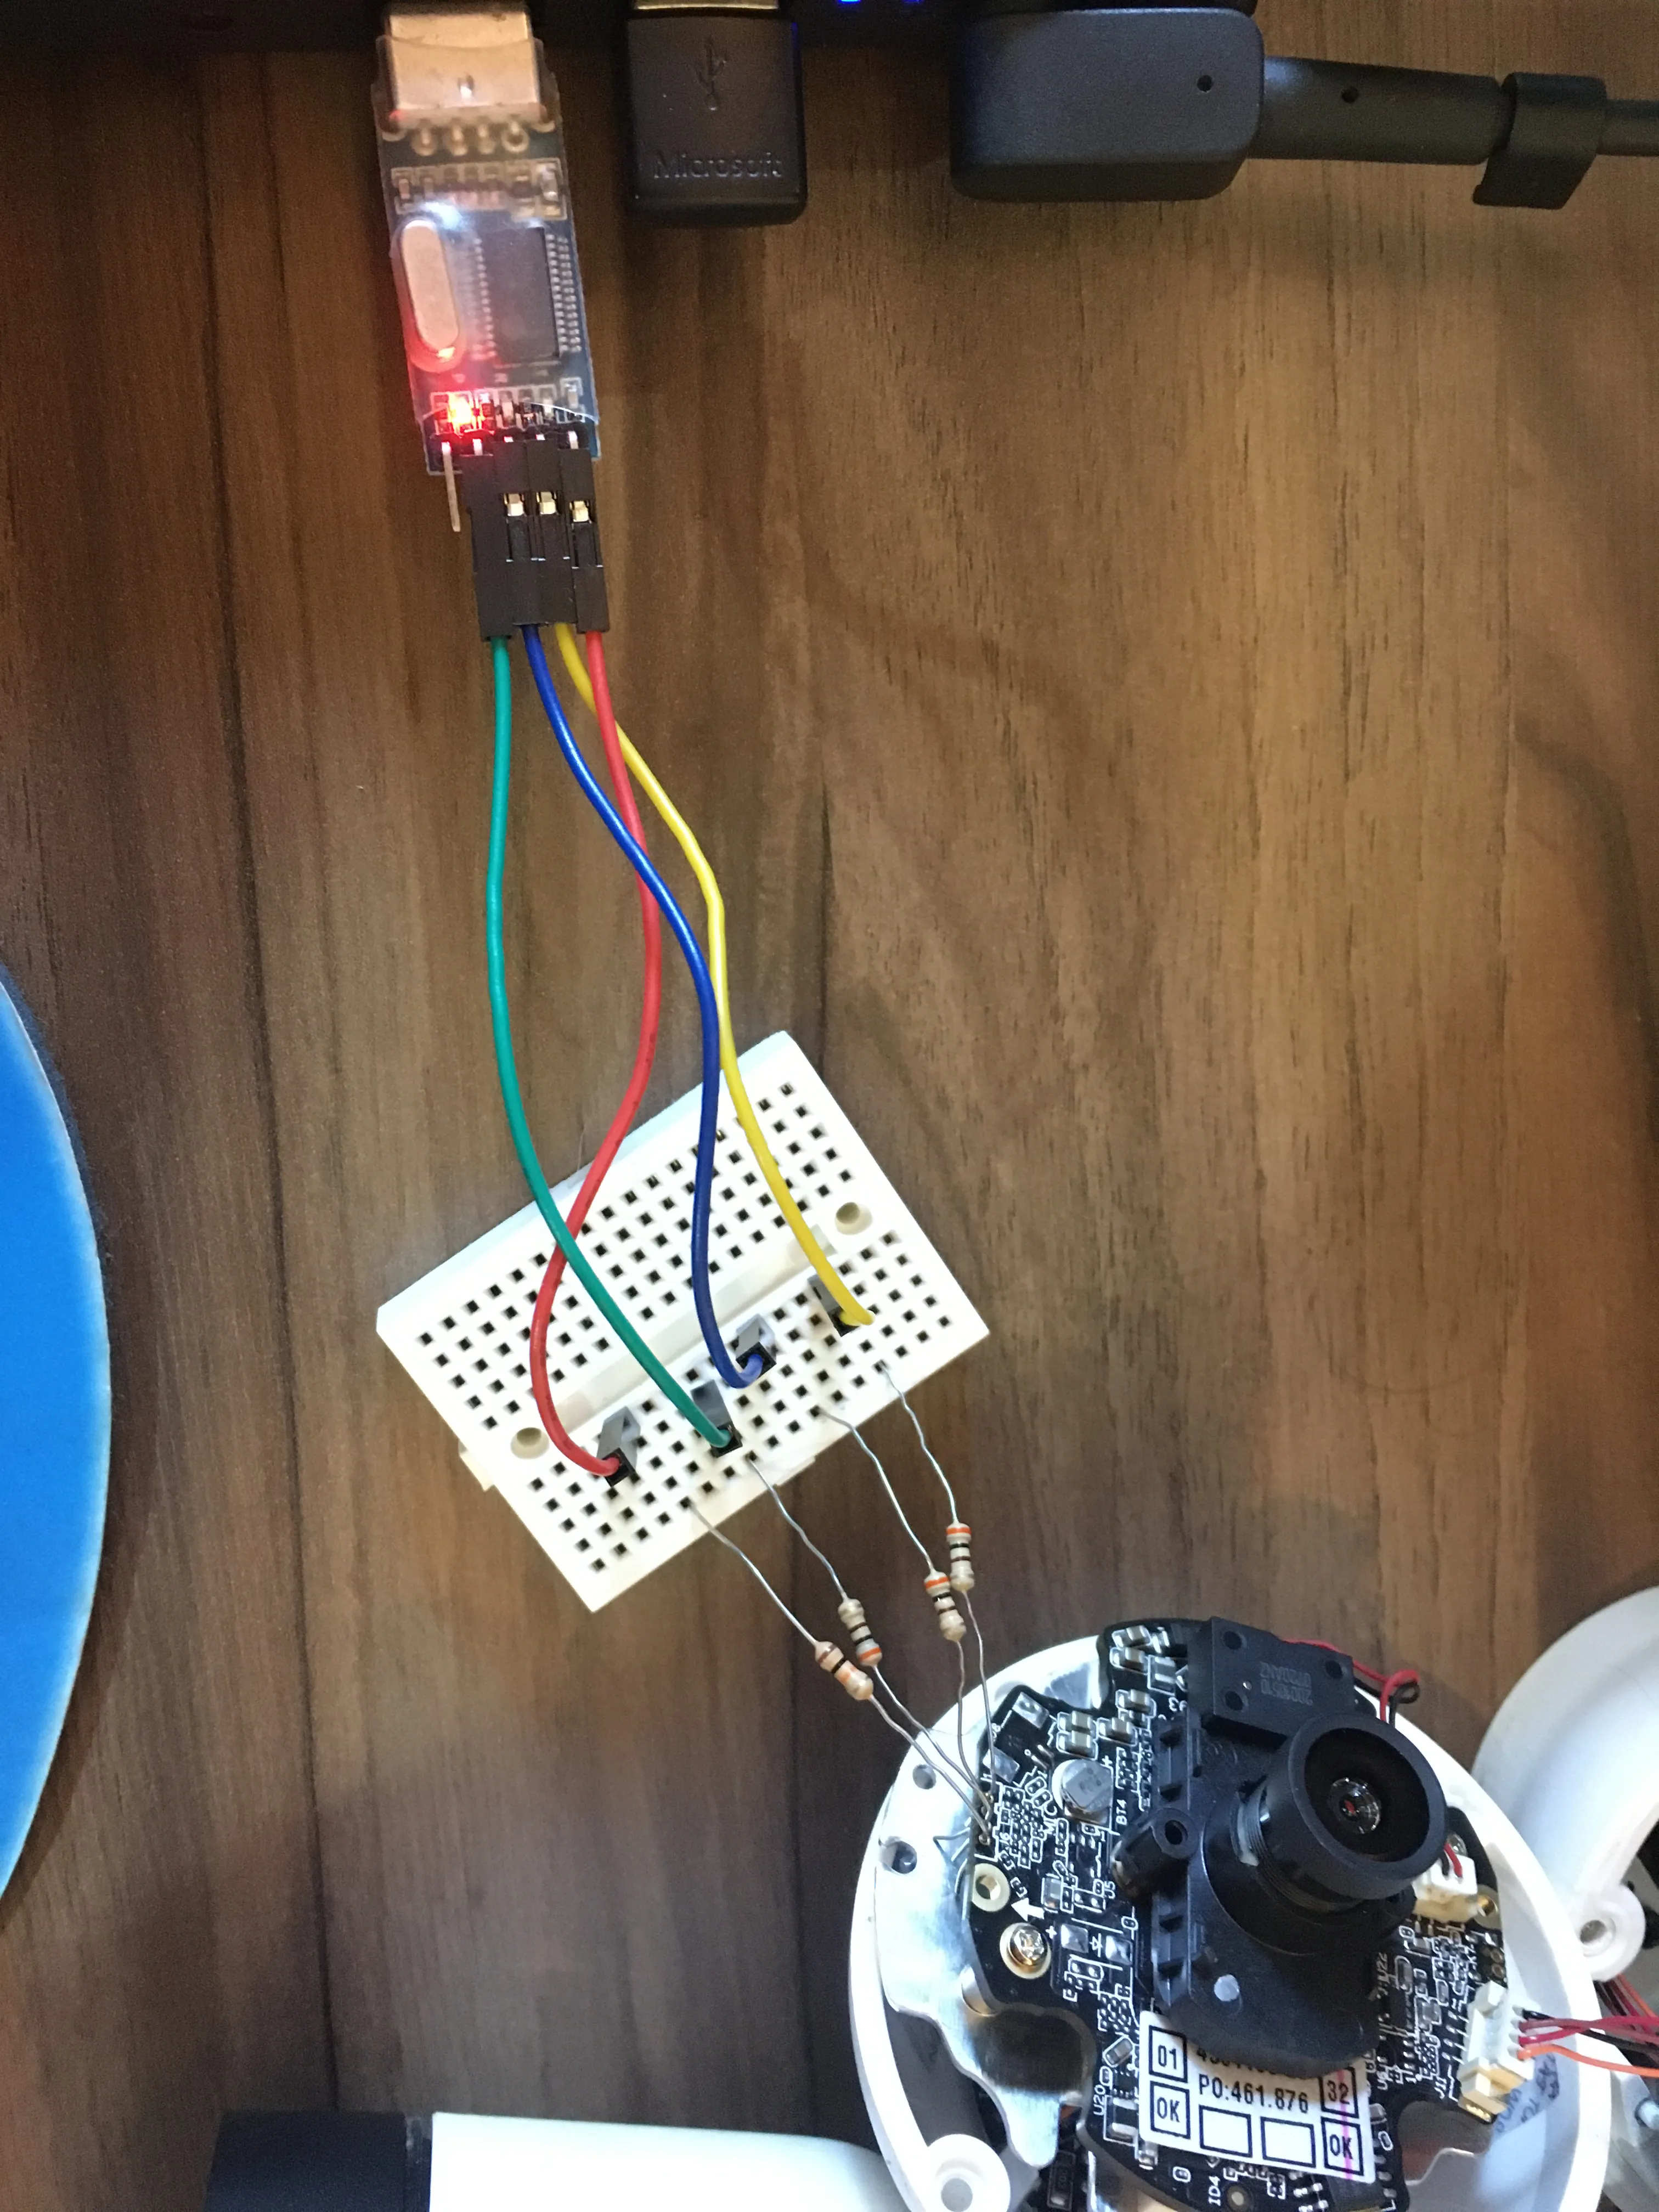
Next, I moved on to connect to the serial port to check what would show up in the camera’s serial output. Using a USB-to-serial adapter I had at home, I connected everything using a protoboard.
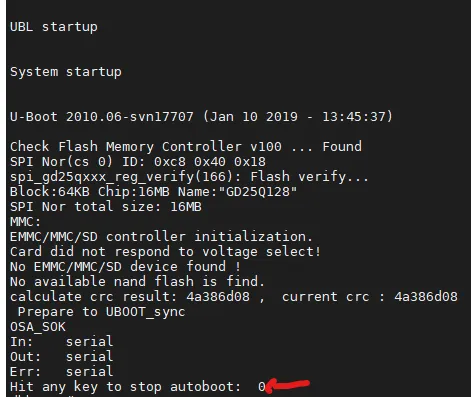
Once this was done, I gained serial access. Although most of the posts I found involved flashing the new firmware manually via the serial command line, I figured out that to gain access to this, you need to interrupt the boot process by pressing any key. Since the interrupt window is only about 1 second, I suggest pressing any key rapidly to avoid missing the timing. It might take 2–3 attempts, but it works eventually.
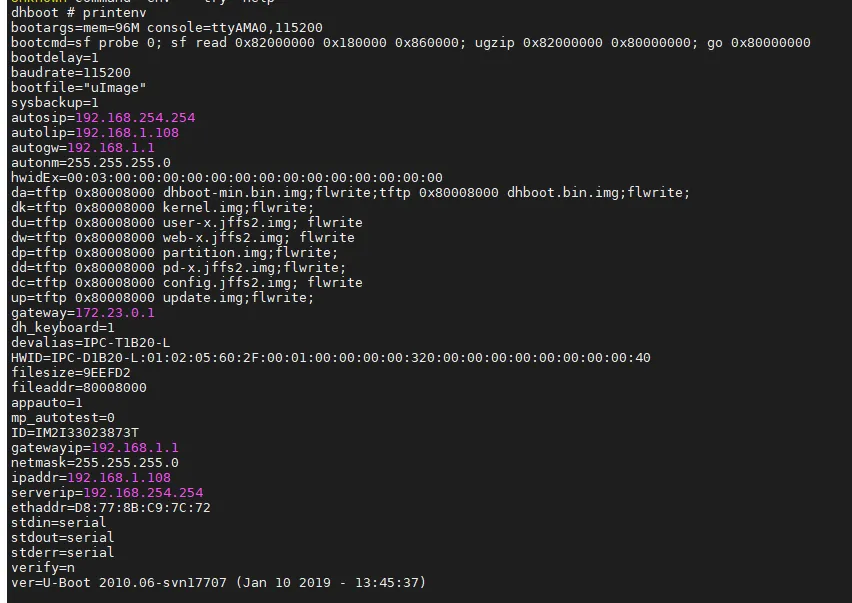
Once you’ve halted the boot process, you can print all the environment variables using the command printenv:
This command lets you check all the values the bootloader uses during the boot process. The main focus here is to find the file names that the bootloader uses to load the operating system.
If you want, you can display all available commands using the help command:
Recovering
All those .img files are contained in the firmware installation package, compressed in a .bin file. To retrieve them (at least most of them), I downloaded the firmware version from the vendor’s website and unzipped it. You’ll see that most of the necessary files will be available.
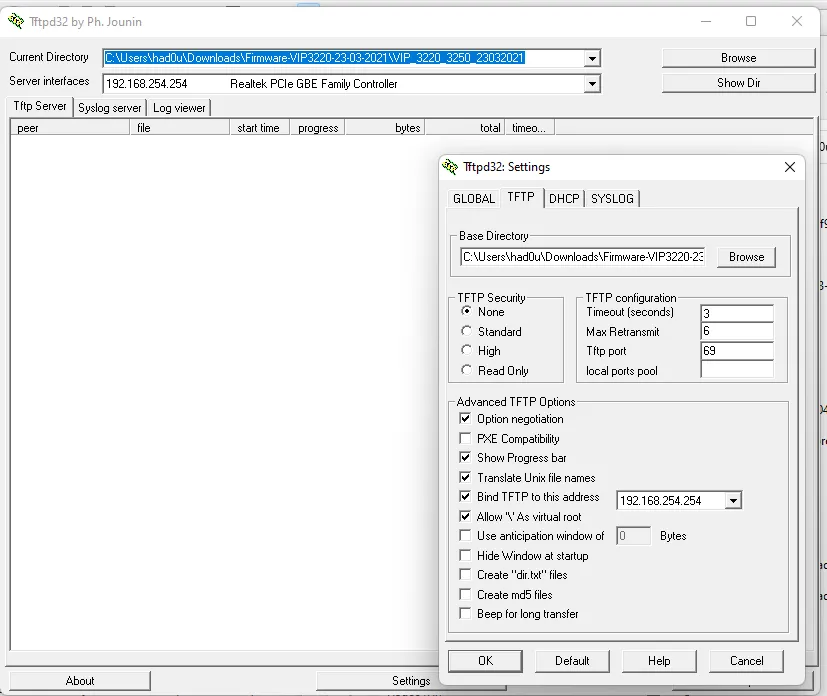
Now that you have the files, you need to make them available to the camera, so the bootloader can download them and proceed with the installation via TFTP. To do this, I used TFTPD32, which you can find online. In my case, I configured my laptop’s network interface with the IP address 192.168.254.254, as I thought it would be the easiest way. However, you can change these values using the setenv command if needed.
After configuring the TFTP server and your laptop’s network interface (and connecting them), I tested the connectivity using the command ping:
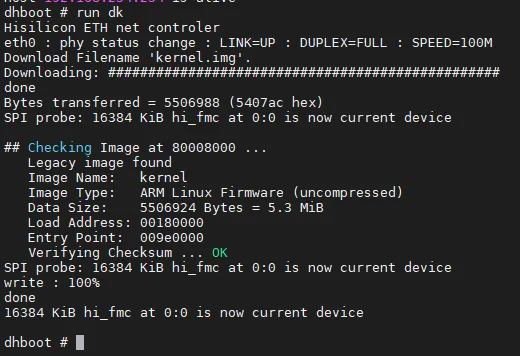
With everything set up and working, you can start the boot process using the command run followed by the name of the .img file you want to install. For example:
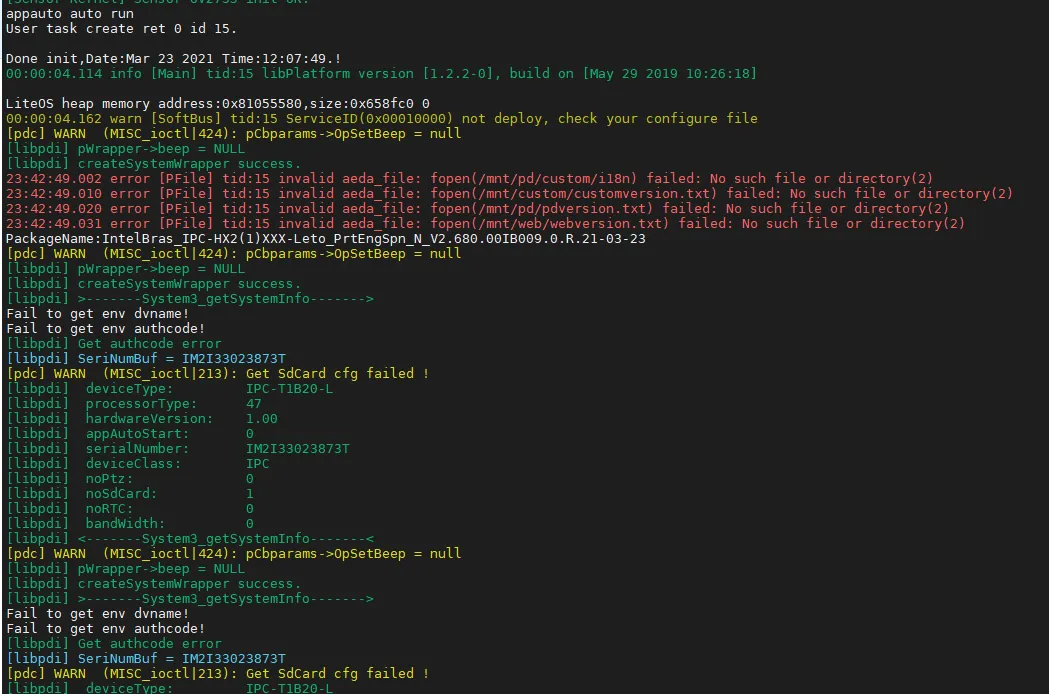
After installing that file, you can repeat the process for all the other files (dk, du, dw, dp, dd, dc, up) but avoid flashing the bootloader unless absolutely necessary. In my case, the last two files didn’t work, but I’m not sure if they were needed. My main goal was to get the basic system running, allowing me to perform the regular firmware upgrade and restore all functions. After all the commands were succefully executed, we can ask for a new boot using the boot command. If all ran well, you should be able to see the differences in the output.
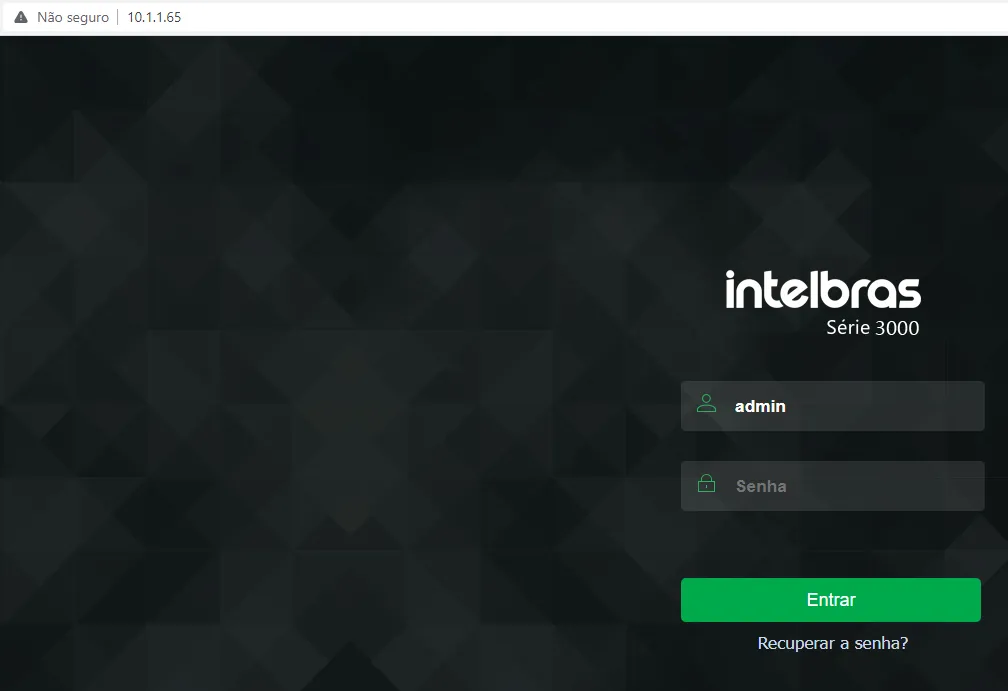
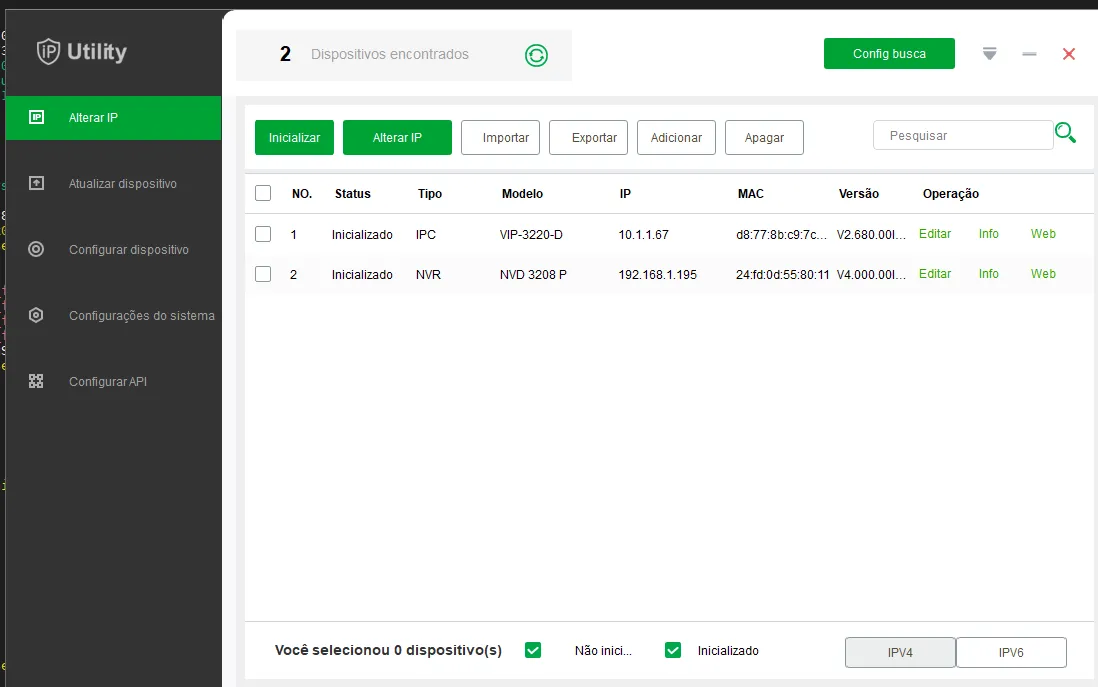
Success! Once the camera booted, it retained its original settings. If this doesn’t happen in your case, you can find its IP address using Wireshark or the vendor’s app (in my case, Intelbras IP Utility).
Once I regained access to the camera, I simply performed a standard firmware upgrade using the .bin file downloaded from the vendor’s website. After that, I reconfigured everything and it was good to go!
I hope you find this guide helpful — it might save your investment. Have a great day!


